Pecan Snowball Cookies Gluten-Free Dairy-Free Vegan

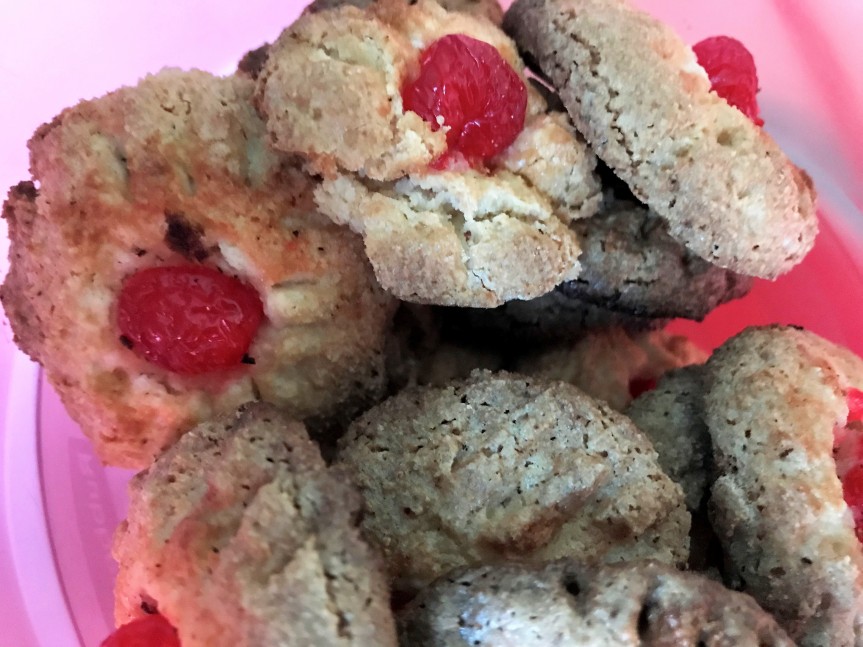
My spouse’s favorite holiday treats are pecan shortbread cookies, so I figured out how to make them gluten and dairy-free so that I can enjoy them too. The ingredients are simple and they are pretty easy to make. I did the whole thing in my food processor. I found out that no matter how many you make, you always want more because they disappear so fast.

Preparation Time: 20 minutes

Cooking Time: 15-18 minutes

Chill Time: 5 minutes

Total Time: 43 minutes

Servings: 32

Ingredients

1 cup PECANS - finely chopped 
1 cup VEGAN BUTTER (at room temperature: soft but not melted) - I use Earth Balance sticks
1/2 cup POWDERED SUGAR
1 teaspoon VANILLA EXTRACT
2-1/4 cups GLUTEN-FREE ALL PURPOSE FLOUR (with Xanthan Gum)
or add 1/2 teaspoon Xanthan Gum if your flour doesn't include it 
1/4 teaspoon SALT
More POWDERED SUGAR for rolling

Directions

  • PRE-HEAT oven to 400 degrees F
  • PREPARE a baking tray with parchment paper
  • ADD the PECANS to a food processor (sharp blade) and grind until they are a coarse powder
  • ADD the BUTTER, SALT, SUGAR, and VANILLA EXTRACT to the food processor (dough blade) and combine by pulsing until the dough starts to hold together. Try not to overprocess the dough. (You can do this all in a large bowl but you will need to cream the butter and sugar together)
  • SCOOP the batter into 1-inch balls using a tablespoon or cookie scoop* onto the prepared baking tray. Leave 1-inch between balls. (You can roll the balls by hand but try not to make them too big.) *I love my 1-inch cookie scoop.
  • FREEZE the tray for at least 5 minutes.
  • BAKE: 15-18 minutes (check often – they should be lightly golden)
  • REMOVE from the oven to COOL for 3-5 minutes but LEAVE THE OVEN ON.
  • PLACE about 1/3 cup more POWDERED SUGAR in a bowl
  • ROLL the balls in the sugar gently while they are still warm. They are very fragile at this point so handle them with care.
  • PLACE the cookie balls back on the tray after they are sugared.
  • RETURN the tray to the oven for 3 minutes to set the sugar.
  • COOL on the tray for 5 minutes
  • ROLL the balls again in more POWDERED SUGAR before carefully moving them to a cooling rack.
  • STORE in an air-tight container.

Cinnamon Coffee Cake Muffins Gluten-Free Dairy-Free

I love the smell of cinnamon in the kitchen. I wanted to make a quick and easy recipe for a breakfast muffin to go with coffee. And, I wanted it to give me that cinnamon filling and crumbly top of a coffee cake. I like the ease of muffins in the morning (or really any time). This recipe can be made vegan, if you use an egg replacer.

Preparation Time: 15 minutes

Cooking Time: 25 minutes

Servings: 24

Ingredients

FILLING
1 cup LIGHT BROWN SUGAR - PACKED (For a sugar-free recipe use coconut sugar instead)
1 Tbsp GROUND CINNAMON

TOPPING
1 cup LIGHT BROWN SUGAR - PACKED (For a sugar-free recipe use coconut sugar instead)
1 cup GLUTEN-FREE ALL PURPOSE FLOUR (with Xanthan Gum) - I used Bob's Red Mill 1-1
1 Tbsp GROUND CINNAMON
1/2 cup VEGAN BUTTER - softened and chopped up

MUFFIN BATTER
3 cups GLUTEN-FREE ALL PURPOSE FLOUR (with Xanthan Gum)
2 tsp BAKING POWDER
1/4 cup LIGHT BROWN SUGAR - PACKED (For a sugar-free recipe use coconut sugar instead)
3/4 cup GRANULATED SUGAR (For a sugar-free recipe use coconut sugar instead)
1 tsp GROUND CINNAMON
1/2 tsp SALT
1 cup VEGAN BUTTER - melted
1 tsp VANILLA EXTRACT
3 EGGS, at room temperature (To make VEGAN - use egg replacer like FLAX eggs)
3/4 cup unsweetened NON-DAIRY MILK (I used Cashew Milk)

Directions

  • PRE-HEAT oven to 350 degrees F
  • Prepare 24 standard muffin tins with paper liners
  • FILLING: In a small bowl, WHISK all the filling ingredients until there are no brown sugar lumps. Set aside.
  • TOPPING: In a medium bowl, COMBINE all the topping ingredients and mix until it forms small crumbles. If you have a pastry blade that might help.
  • REFRIGERATE the topping until later
  • BATTER: In a large bowl, MIX together the flour, baking powder, light brown sugar, granulated sugar, cinnamon, and salt.
  • ADD the melted butter and vanilla, and using a hand mixer on low, completely combined with the dry ingredients.
  • BEAT in the eggs and mix until smooth.
  • POUR the milk in, about a 1/4 cup at a time, and BEAT until smooth. Set aside.
  • ASSEMBLE: FILL muffin cups about 1/4 full with batter.
  • SPRINKLE the filling on top of the batter in each muffin cup; cover from side to side.
  • FILL muffin cups with the rest of the batter (about 1/2 full – do not overfill)
  • SPRINKLE topping evenly over muffins in each cup and pat down so that it covers nicely
  • BAKE: 20-25 minutes or until a toothpick comes out clean from the center of the muffins
  • COOL in the pans for 10 minutes before serving or moving muffins to a cooling rack
  • STORE in an air-tight container for a few days or freeze for up to 3 months. Thaw in the refrigerator and heat in the microwave for 10-15 seconds. These muffins are awesome when warm – I have been spreading vegan cream cheese on top.

Chicken Marsala – Gluten Free

My family is crazy about this classic chicken dish – mushrooms, chicken breasts, and marsala wine. It is light and moist with just the right amount of spices. This dish is great to serve to company but works well as a quick weekday dinner as well. I paired it with dairy-free mashed red potatoes and broccoli.

Preparation Time: 15 minutes

Cooking Time: 20 minutes

Servings: 4

Ingredients

1/4 cup GLUTEN-FREE ALL-PURPOSE BAKING FLOUR* 
1/2 teaspoon SALT
1/4 teaspoon GROUND BLACK PEPPER
1/2 teaspoon DRIED OREGANO
2 skinless, boneless CHICKEN BREASTS (cut in half and pounded to 1/4")
8 tablespoons VEGAN BUTTER
8 tablespoons OLIVE OIL
2 cups slices MUSHROOMS
1 cup MARSALA WINE
1/2 cup COOKING SHERRY

Directions

  • In a shallow bowl, MIX flour, salt, pepper, and oregano.
  • ROLL the chicken around in the flour mixture until it is completely coated on all sides. SHAKE off excess.
  • In a large skillet over MEDIUM heat, MELT butter and oil together.
  • PLACE chicken in pan and lightly brown on one site.
  • TURN OVER chicken and ADD mushrooms.
  • POUR in wine and sherry.
  • COVER skillet and SIMMER for 10 minutes, TURNING once.
  • It is done when chicken is no longer pink and juices run clear.
  • TIP: Gluten-free flour should never be scooped directly from the package because it compacts. Spoon it out into your measuring cup and level off to make sure you get the right amount. Doesn’t matter so much in this recipe but it does if you are baking.

Easy Banana Bread Gluten-free Dairy-free

It’s OK if you don’t want to believe me, but this is the best Banana Bread you will ever eat and it is also gluten and dairy free. Once you make it you will absolutely agree. I made this batch with dairy-free chocolate chips and topped it with walnuts but I have also made it with raisans, flax seed, and almonds. Let me know how yours turns out and what options you put in.

Preparation Time: 15 minutes

Cooking Time: 45-50 minutes

Servings: 12 slices (2 loaves)

Ingredients

4 large EGGS
4-5 very ripe BANANAS, mashed
1 cup SUGAR
4 ounces natural APPLESAUCE
1/3 cup high quality VEGETABLE OIL
1 teaspoon VANILLA
2 cups GLUTEN-FREE ALL-PURPOSE BAKING FLOUR
1 teaspoon BAKING SODA
1/4 teaspoon SALT
OPTION Pairings:
1/2 cup DAIRY-FREE CHOCOLATE CHIPS
1/2 cup WALNUTS, chopped/smashed
or
1/2 cup RAISINS
1/2 cup FLAX SEED
1/2 cup ALMONDS, chopped


Directions

  • PRE-HEAT oven to 350 degrees F
  • COAT two 9X5 loaf pans with cooking spray
  • In a large bowl, BEAT the eggs and add the bananas and MASH together (or you can mash the bananas before this step, but I don’t like to dirty too many bowls)
  • ADD the sugar, oil, vanilla, and applesauce and mix together well
  • In medium bowl, BLEND together the flour, salt, and baking soda
  • ADD the dry ingredients into the banana mash and with a big spoon or spatula MIX until all the dry ingredients are combined. Banana lump are fine, don’t over mix.
  • FOLD IN any mix-ins at this point
  • TRANSFER the batter into the loaf pans and SPRINKLE the top of each loaf with the nuts
  • BAKE for 45-50 minutes or until a toothpick in the center of the loaf comes out clean
  • COOL in the pans for 10 minutes and then REMOVE from pans and cool on a wire rack for another 20 minutes
  • NOTE: Try peeling your bananas from the bottom up, instead of the stem down, for easy, no mess peeling, especially when over ripe.
  • STORE in an air-tight container on the counter for up to 2 days, then refrigerate. This bread freezes well for up to 6 months. Slice it frozen and toast it in the toaster oven.

My Maryland Crabcakes – Gluten-Free & Dairy-Free – Fried or Broiled

Living in Maryland makes me a blue crab snob, for sure. Trying to get Gluten Free Crabcakes anywhere but in my own kitchen, is close to impossible. Most people use bread crumbs for filler, so I created a gluten-free and dairy-free crabcake with just the right amount of Old Bay seasoning that is both moist and flaky. As a condiment, I make my own cocktail sauce, which far surpasses anything in a bottle. My family loves crab and even the non-gluten-free people are in love with these cakes, Note that this recipe for 4 only fed 2 for dinner at my house. Some options to extend it might be to double the recipe (but right now lump crab is $70 a pound), make them smaller and use them as an appetizer, or extend them with a pound of claw crab meat. I updated this recipe in June 2021 to add a broil option for those that like it that way as well as changed around the order of mixing, because it works better.

Preparation time: 10 minutes + (minumum)1 hour in refrigerator

Cooking time: 8-10 minutes per cake

Servings: 4 (8 cakes)

Ingredients

1 pound fresh LUMP CRAB (Maryland jumbo lump or backfin)
1/4 cup MAYONNAISE
1-1/2 teaspoon DIJON MUSTARD
1-1/2 teaspoon OLD BAY seasoning (or more to taste)
1 teaspoon WORCESTERSHIRE sauce
1 teaspoon LEMON JUICE
1/4 teaspoon KOSHER SALT
1/4 to 1/2 cup Italian style gluten-free BREAD CRUMBS (start with 1/4)
1 teaspoon PARSLEY
1 EGG, lightly beaten
1/2 cup VEGAN BUTTER

Directions

  • DRAIN crab, if necessary, and PICK through for shells. The good-quality jumbo lump should not have shells. Place cleaned crab meat in a bowl and set aside.
  • In a large bowl, WHISK together mayonnaise, mustard, Old Bay, Worcestershire sauce, lemon juice, and salt.
  • FOLD in the crab meat gently, trying not to separate the lumps. Combine well.
  • SPRINKLE the parsley and breadcrumbs over the crab mixture and mix gently but fully, once again trying not to break the lumps. Be careful not to mash them too much, you want the lumps to be whole.
  • In a small bowl, BEAT the egg lightly and pour over the crab/breadcrumb mixture folding gently with your hands. (Don’t over mix.)
  • COVER the bowl with plastic wrap and refrigerate for at least 1 hour. (I put them in the refrigerator usually a few hours before cooking.)
  • When ready to cook, take the bowl out of the refrigerator and with clean damp hands, FORM the chilled crab mixture into 8* cakes, about 3-inches wide by 1-inch thick (kind of like flat baseballs). Place the formed cakes on a clean plate.
    • Or make 12 2-inches wide by 1-inch thick cakes and serve as an appetizer
  • TO FRY
    • HEAT a large skillet on medium-high heat. ADD butter and heat for about 2 minutes until the butter becomes frothy.
    • ADD the cakes to the pan. (8 1-inch cakes should all fit into a 12-inch skillet.)
    • FRY the crab cake on medium-high for about 4 minutes until golden brown then FLIP the cake and reduce heat to medium-low for another 4 minutes, until the other side is golden.
    • SERVE cakes immediately with cocktail sauce (or tartar if you prefer).
  • TO BROIL
    • PRE-HEAT the broiler in your oven.
    • PLACE the formed cakes on a parchment paper-lined backing sheet.
    • Slightly SPRINKLE them with Old Bay seasoning.
    • BROIL the cakes for 10 minutes or until golden brown.
  • STORE leftovers in the refrigerator in an airtight container for 2 days.

Inspired by Classic Maryland Crab Cakes Recipe by Susie Middleton, Fine Cooking Issue 99

Vegetables, Kale, & Quinoa Bake

I am always looking for ways to add kale to things. In general, I find kale a hard vegetable to eat, so I need to “dice it and spice it” to make it work for me. This casserole works with or without vegan cheese and I add different vegetables depending on what I have available. I’ve made this in less than 30-minutes with a 20-ounce package of frozen veggies (broccoli, cauliflower, and carrots) and a 10-ounce package of chopped kale. I eat this as my dinner entree but it would work great as a healthy side dish for meat eaters too.

Preparation time: 10 minutes

Cook time: 40 minutes (20 minutes if using frozen veggies)

Servings: 8

Ingredients

4 SWEET POTATOES, peeled and chopped small*
4 CARROTS, peeled and chopped small*
1 head BROCCOLI, chopped small*
2 teapoons of EXTRA VIRGIN OLIVE OIL, divided
SALT and PEPPER to taste
1 cup QUINOA
2-1/4 cups WATER or VEGETABLE STOCK
4 cloves GARLIC, minced
1 ONION, chopped small
10 ounces KALE, ribbed and chopped
1 teaspoon CUMIN
2 teaspoons CHILI POWDER
1 cup VEGAN CHEDDAR CHEESE (optional)

*Or replace the vegetables to be roasted
with a 20-ounce bag of mixed frozen vegetables
(like broccoli, cauliflower, and carrots).

Directions

  • ROAST FRESH vegetables
    • PREHEAT oven to 400 degrees F
    • LINE a baking sheet with aluminum foil
    • CHOP sweet potatoes, carrots, and broccoli into bitesize pieces
    • PLACE chopped veggies on the baking sheet and COAT with 1 teaspoon of the olive oil and salt and pepper to taste. MIX well. (I use my hands to MIX the oil with the veggies to make sure they are well coated.)
    • COOK for 30 minutes or until vegetables are tender and golden
    • REMOVE vegetables from the oven but KEEP THE OVEN ON
  • If using FROZEN vegetables, ignore the roasting instructions above and cook them according to the package then set aside until later.
  • PREPARE quinoa
    • Follow the package directions.
      • If you don’t have directions, here is how I cook quinoa: I rinse it well in a mesh strainer then COMBINE 2 cups of vegetable stock or water in a medium saucepan with 1 cup of quinoa.
    • ADD another 1/4 cup of liquid to keep the quinoa moist for when you bake it.
    • Bring to a BOIL then reduce heat for 15 – 20 minutes. You want some liquid left for moisture.
    • When quinoa is done, turn off heat and set aside.
  • PREPARE KALE MIX
    • CHOP onions, MINCE garlic, and CHOP kale
    • HEAT a large skillet on medium heat
    • ADD 1 teaspoon olive oil
    • ADD onions and SAUTE for 3 minutes
    • ADD garlic and SAUTE for another 2 minutes
    • ADD kale in batches, as much as your pan will hold
    • ADD a tablespoon of water for STEAM
    • COOK down kale and keep adding more kale and water until the kale has wilted to about 1/2 its original size. SAUTE as you go.
  • In a large bowl, COMBINE kale mixture, cooked mushy quinoa, and roasted (or cooked frozen) vegetables. Add cumin, chili powder, and salt and pepper to taste. STIR well.
  • SPRAY a large baking dish with cooking spray
    • NOTE on baking dishes: I use an 11 X 7 X 1-1/2 inch baking dish which holds 10 cups. Different size baking dishes require different amounts of time to cook. For example, if you use a 9 X 9 X 2, which is the same 10 cups as my 11 X7 X 1-1/2″, you should decrease the oven temperature to 325 degrees F and increase the time to complete cooking to 40 or 45 minutes, This is because the set up in the 9 X 9 X 2″ is thicker so it will take longer. (This hint came from the simpleveganblog.com)
  • ADD the total mixture into the baking dish and spread evenly across
  • If you opt to use vegan cheese as a topping, sprinkle the vegan cheese across the whole mixture evenly
  • BAKE for 10 minutes minimum (until cheese has melted).

Butternut Squash Soup – Vegan & Gluten-free

Apples make this soup sweet while cayenne pepper and smoked paprika give it zest. This soup is simple to make in one pot, naturally gluten-free, and by using coconut milk, it’s vegan too. I was going to use fresh butternut squash, but I waited too long and it went bad, so I grabbed a few bags of frozen chopped butternut squash from the freezer and, voila, an easy and delicious winter delight was born.

Butternut Squash preparation: 1 hour if fresh or 20 minutes if frozen

Soup preparation time: 20 minutes

Cooking time: 20 minutes

Servings: 6

Ingredients

4 cloves GARLIC, minced
1 large ONION, roughly chopped
2 large APPLES, peeled, corded, and roughly chopped
1 medium BUTTERNUT SQUASH (3 lbs) or 40 ounces frozen
1 tablespoon EXTRA VIRGIN OLIVE OIL (EVOO)
4 cups VEGETABLE BROTH
1 BAY LEAF
1 sprig SAGE
1/2 teaspoon KOSHER SALT
1/4 teaspoon ground BLACK PEPPER
1/8 teaspoon CAYENNE PEPPER
1 teaspoon NUTMEG
1 cup canned unsweetened COCONUT MILK (plus some for topping)
Sprinkle of SMOKED PAPRIKA

Directions

  • PREPARE butternut squash
    • If FRESH:
      • PREHEAT oven to 350 degrees F
      • CUT squash in half lengthwise
      • SCOOP out seeds and discard
      • SPRAY flesh with cooking spray and a pinch of salt and pepper
      • PLACE flesh side down in a baking dish and add 1/2 cup of water
      • BAKE about 1 hour, until flesh is soft
      • COOL until you can handle and then SCOOP out the flesh
    • If FROZEN:
      • PLACE frozen cubed squash in a microwave safe bowl and add 2 tablespoons of water per 10 ounces of cubes
      • MICROWAVE for 5 minutes per 10 ounces (time depending on the power of your microwave). You want the cubes to be soft not frozen.
  • HEAT the oil in a large stockpot over medium heat
  • ADD the onions and SAUTE for 5 minutes
  • ADD the garlic to the onions and SAUTE for another 2 or 3 minutes until the onions are translucent and the garlic is tender
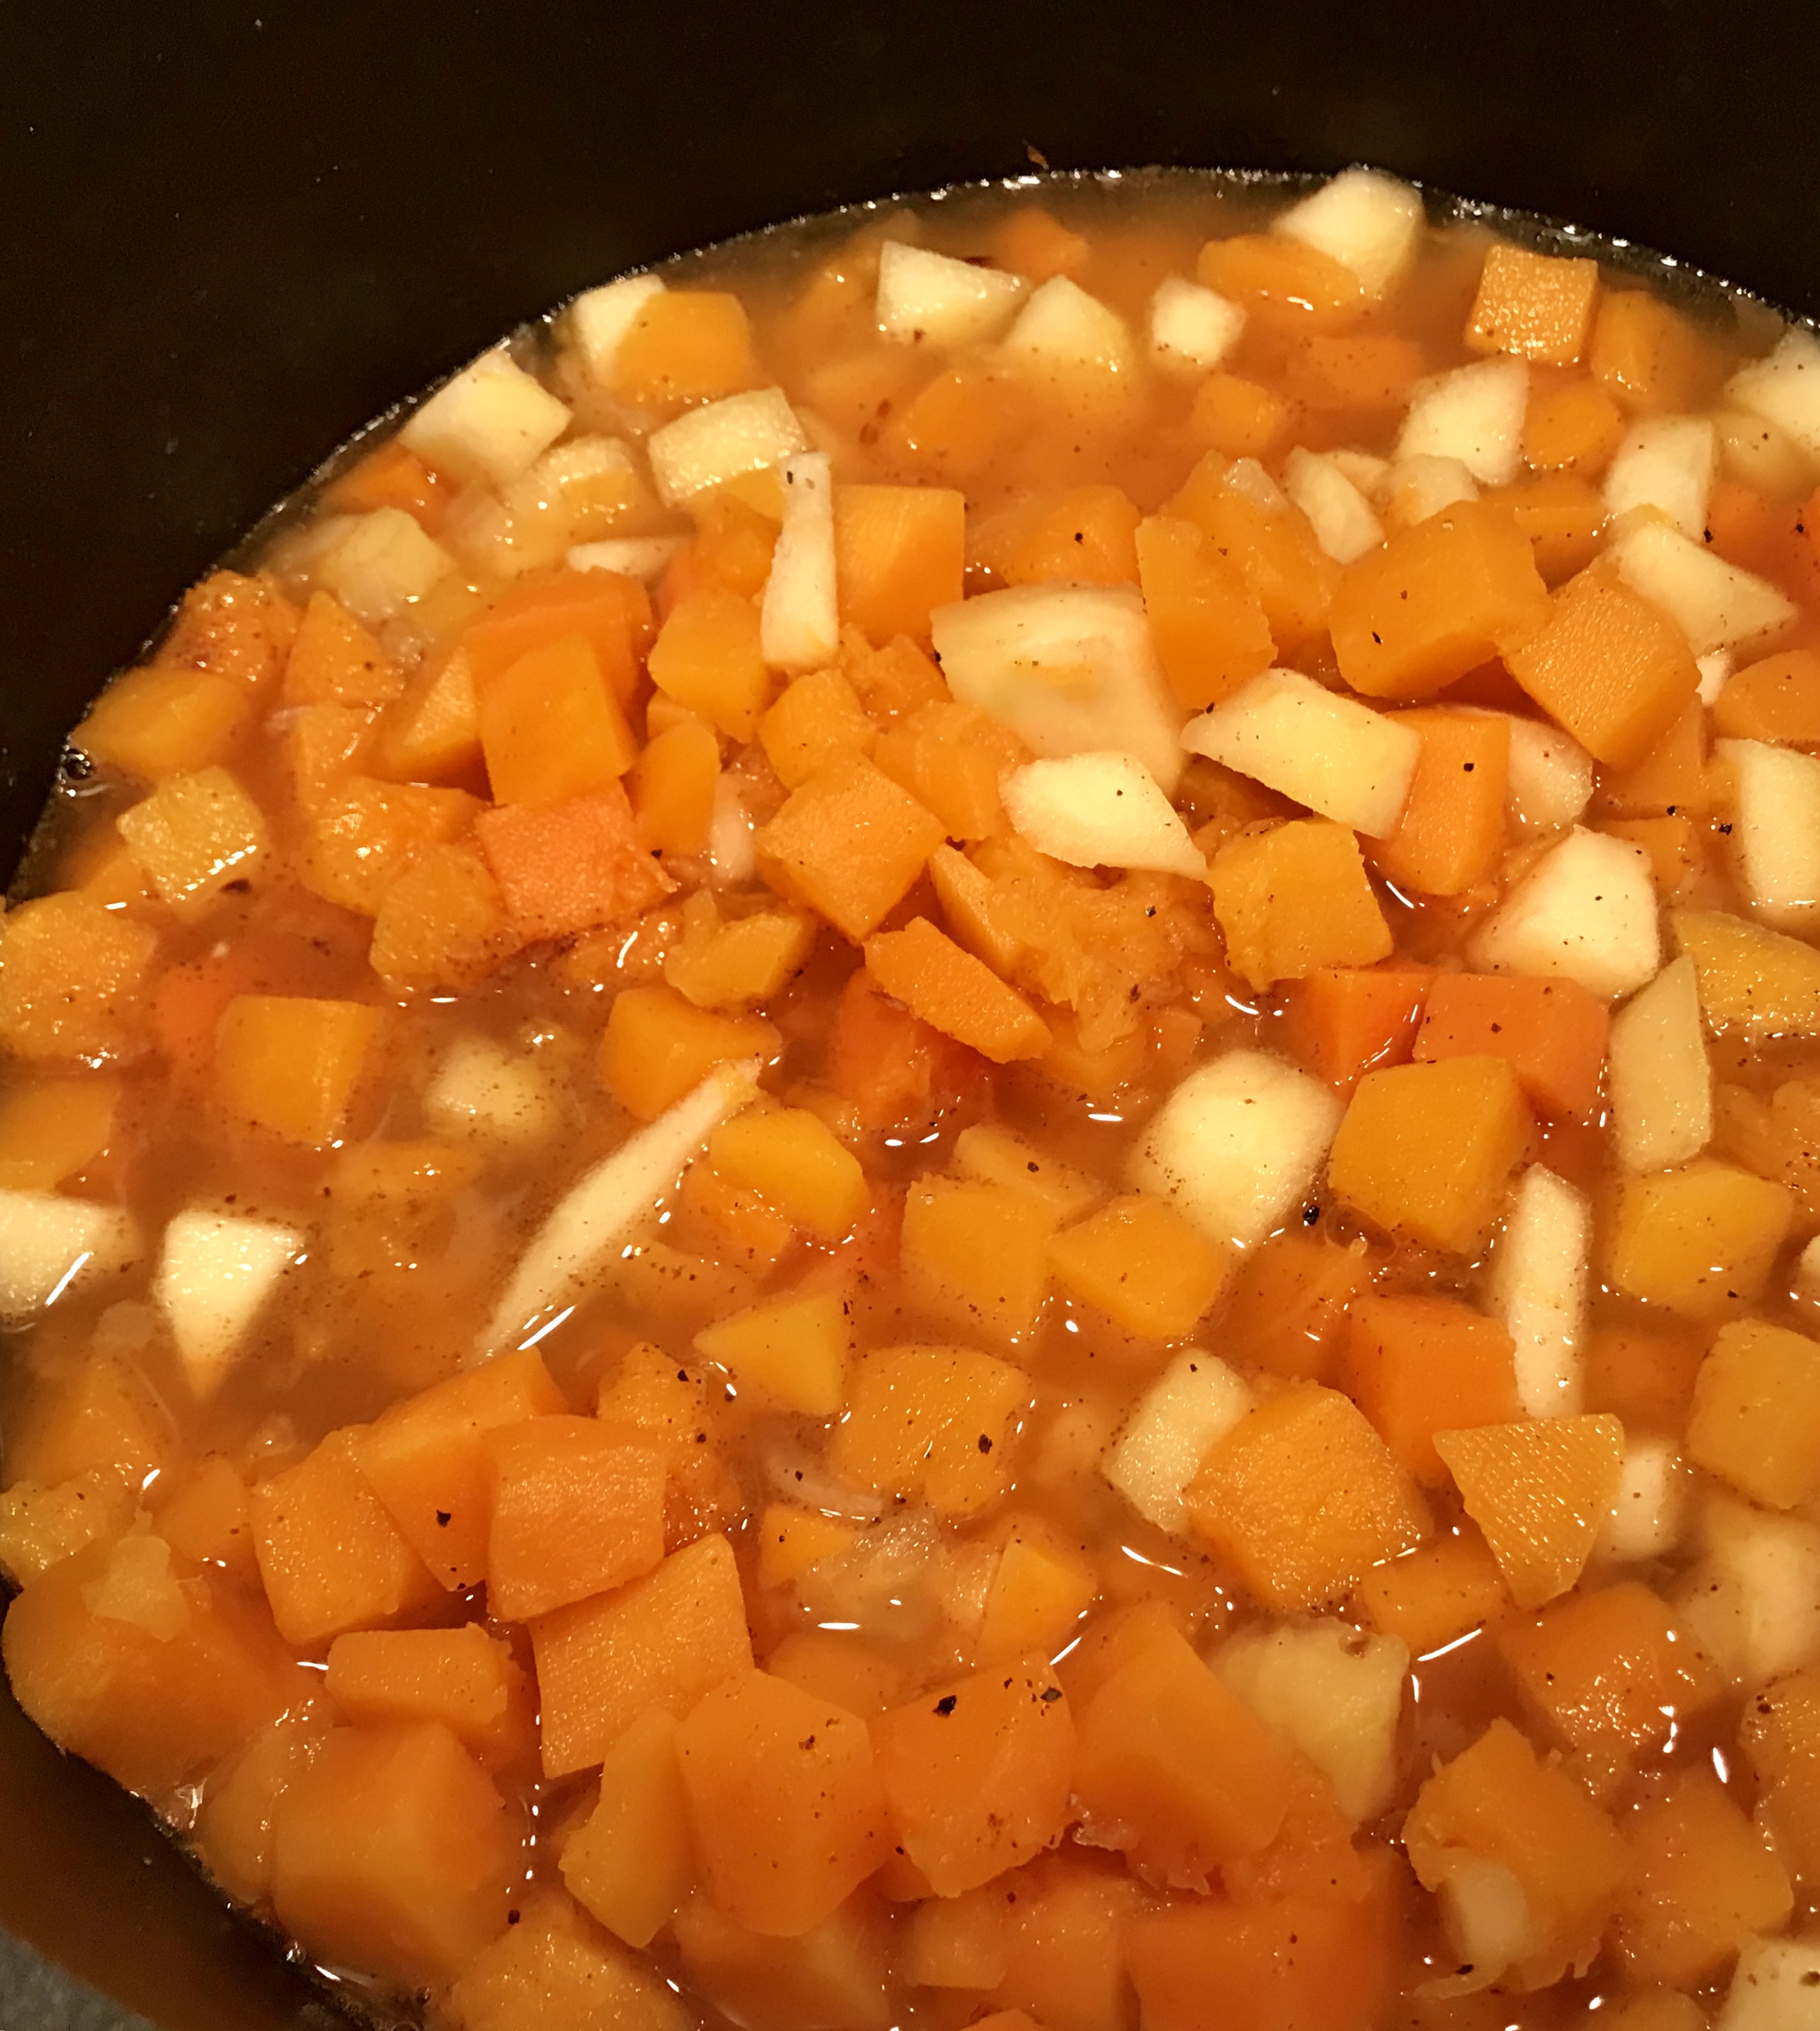
  • ADD the apples, butternut squash, sage, nutmeg, bay leaf, salt, pepper, cayenne pepper, and vegetable broth and STIR well
  • ADD the coconut milk and STIR until blended
  • Bring mixture to a BOIL and then turn off heat
  • REMOVE sprig of sage and bay leaf and discard
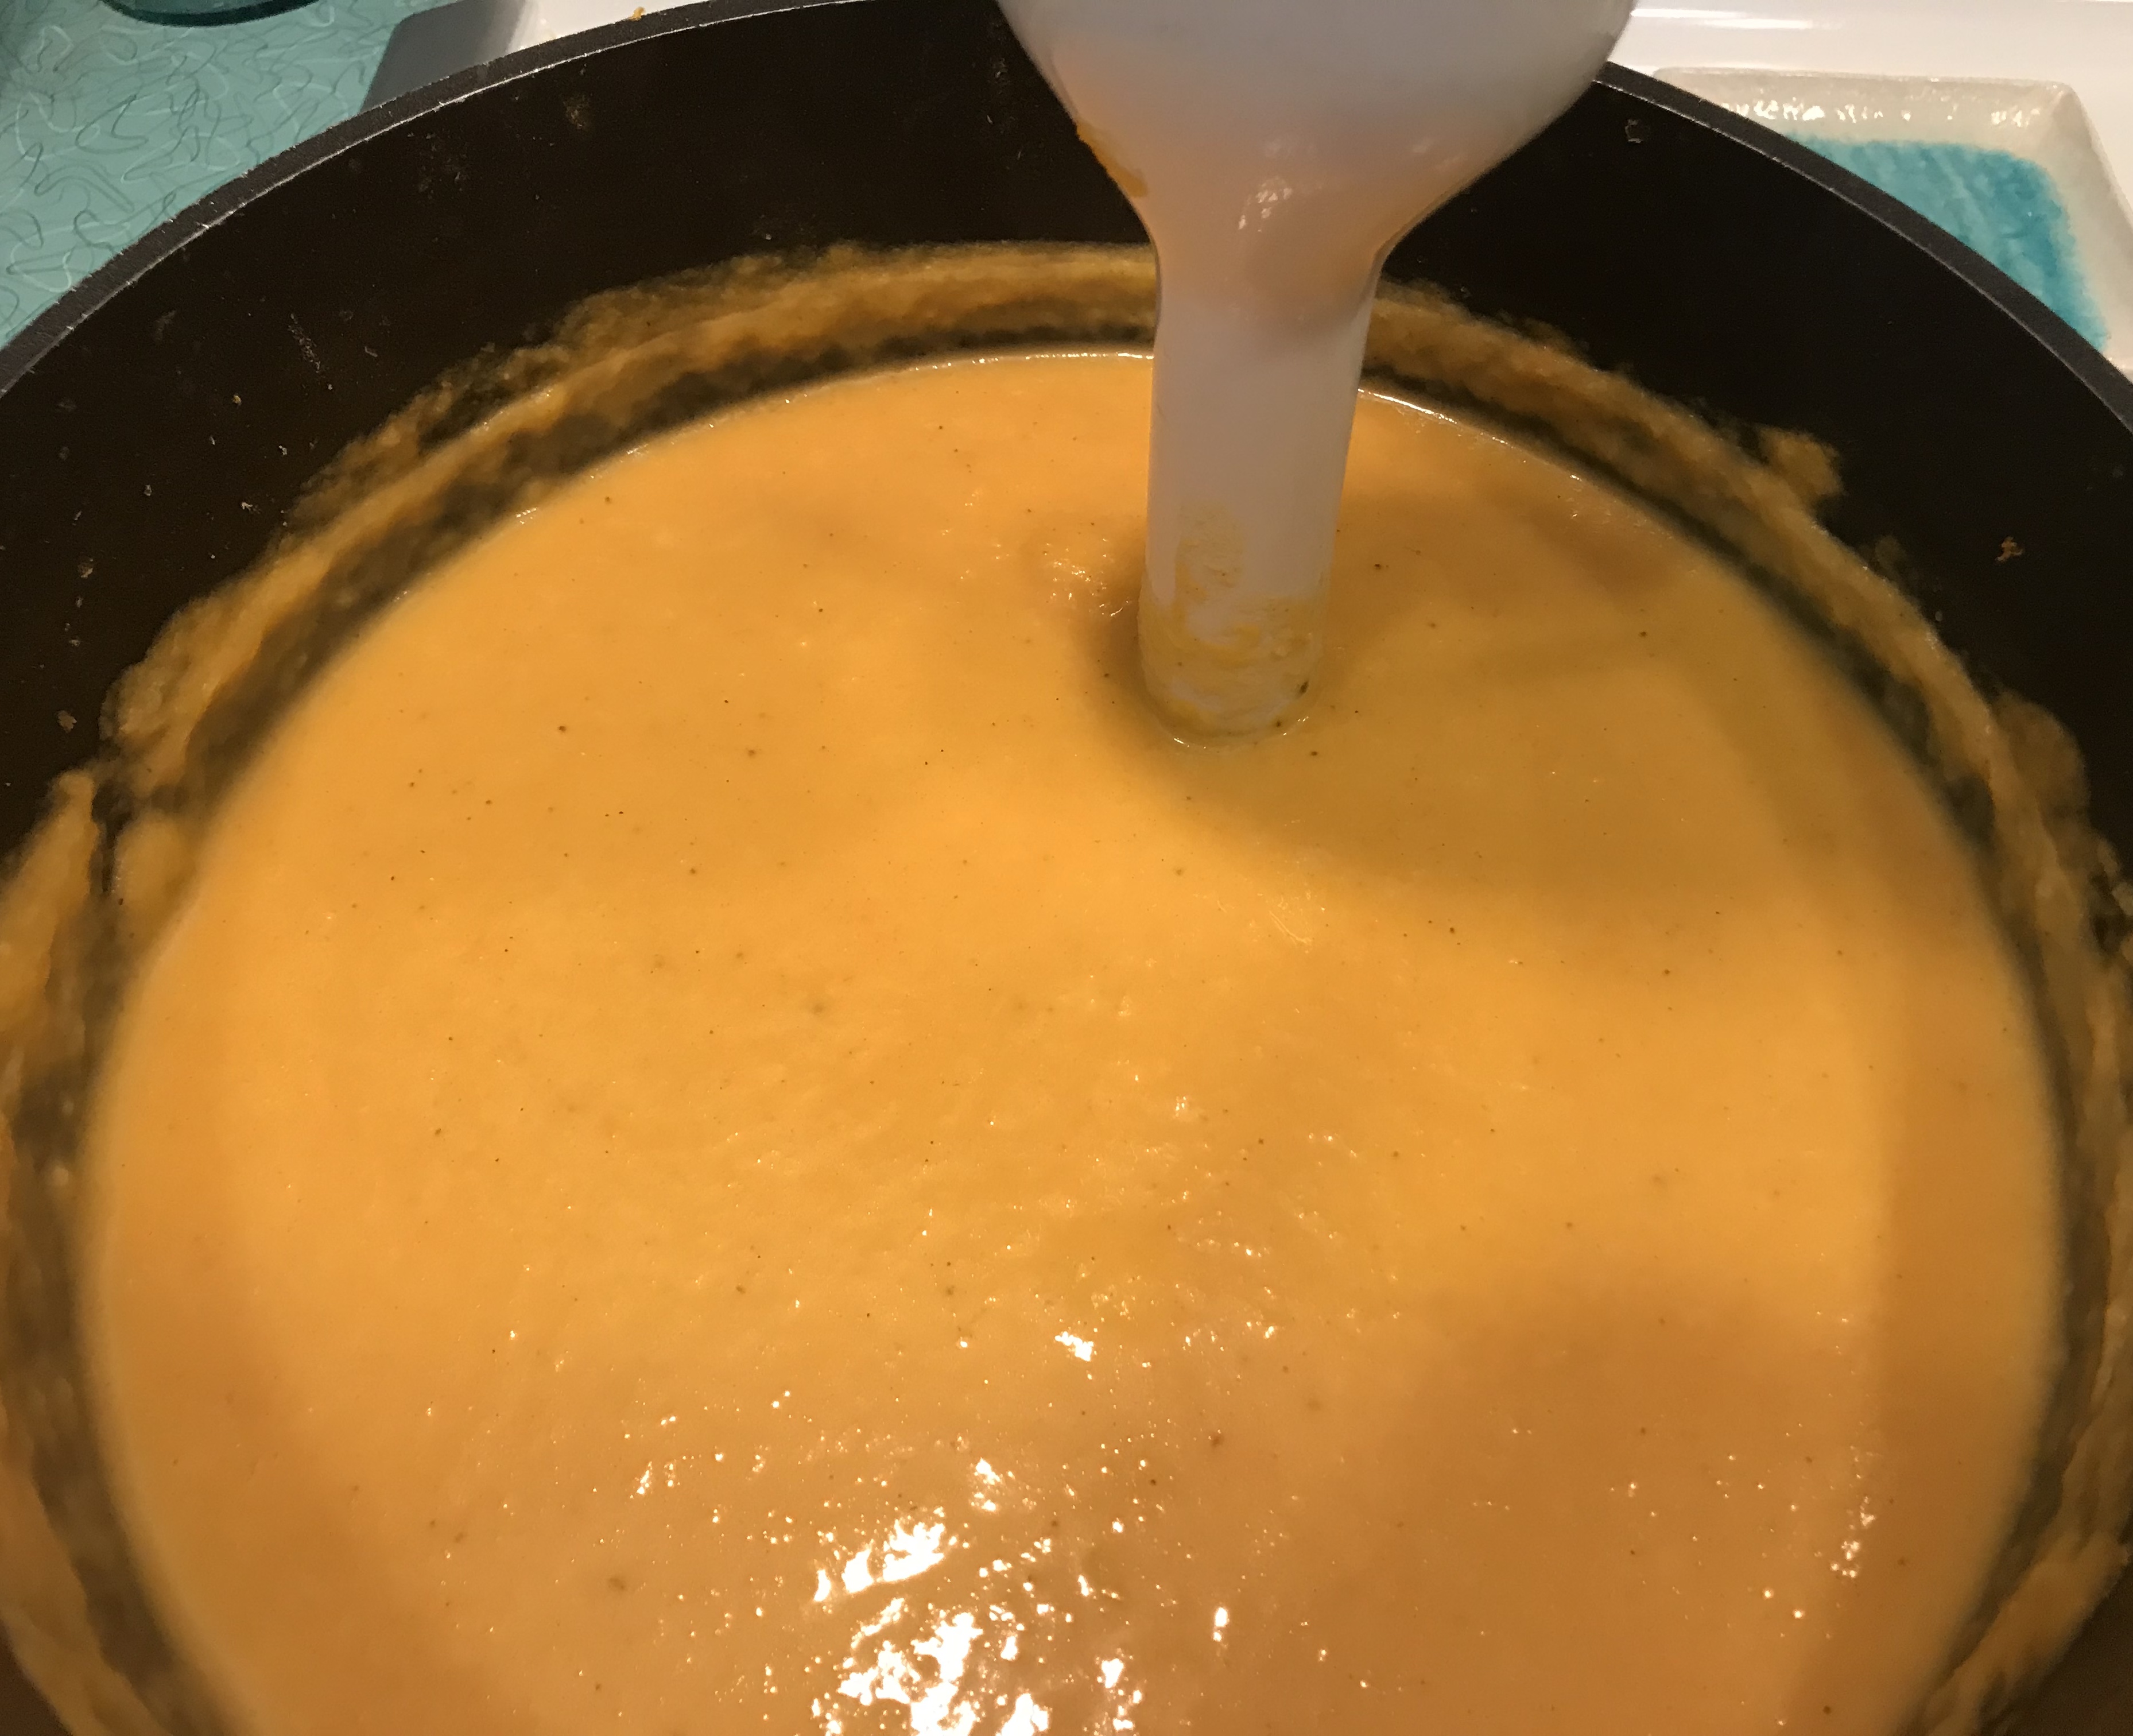
  • PUREE the soup directly in the pot using an immersion blender* to your desired smoothness.** Be very careful when working with hot liquid.
    • *If you don’t have an immersion blender, you can use a regular blender. Transfer the soup in small batches to a countertop blender and puree each batch until smooth. Be careful when filling the blender and make sure to put the top on because hot liquid can really hurt you.
    • **I leave some chunks of apple in my soup, just because I like it that way.
  • ADD additional seasoning to taste
  • SERVE warm TOPPED with extra coconut milk and a SPRINKLE of smoked paprika

Best Waffles Ever Gluten-Free Dairy-Free

For years I used different brands of store-bought gluten-free pancake mixes (some good, some not so good) but I wanted my waffles to be fluffier and tastier, so I decided to make them from scratch. These turned out to be the “best waffles ever,” so says the family. No one cares that they are gluten and dairy free, they just gobble them up. 

Preparation time: 15 minutes

Cooking time: 5 minutes per waffle (depends on iron)

Yield: 8 waffles

Ingredients

1-3/4 cups GLUTEN-FREE ALL PURPOSE FLOUR
2 teaspoons BAKING POWDER
1 teaspoon SALT
2 tablespoons COCONUT SUGAR
2 EGGS, beaten
1-1/2 cups CASHEW MILK (or other plant-based alternative)
1/4 cup VEGETABLE OIL
1 taspoon VANILLA EXTRACT
Squirt of LEMON JUICE
Topping options:
Fresh FRUIT, pure MAPLE SYRUP, and/or Vegan BUTTER

Directions

  • In a large mixing bowl, COMBINE flour, baking powder, salt, and sugar and mix.
  • Make a little hole in the center of the dry ingredients, crack the eggs in the center and BEAT well.
  • WHISK in the milk, oil, vanilla extract, and lemon juice until well blended. The more air, the fluffier the waffle.
  • Let the batter rest from at least 10 minutes. I make mine before everyone gets up and then refrigerate the batter until needed.
  • HEAT you waffle iron (If your iron is not non-stick you might need to use cooking spray).
  • Using a soup ladle, POUR the batter onto the waffle iron and close the lid. Waffle irons vary so the amount of batter you need will depend on the shape and size of the iron you have. I use a 1/2 cup measure with mine.
  • COOK until waffle iron stops steaming, My waffle iron has a light that tells me when it is done to a particular setting.
  • Using a sharp fork, carefully REMOVE the waffle from the iron.
    • If you are making a stack of waffles, preheat your oven on a low temperature and then pile each waffle on top of the other on an oven proof plate as you finish making them. Keep the stack in the warm oven until ready to serve.
  • TOP with vegan butter and maple syrup or try fresh fruit.
  • Storage: You can store them in the refrigerator for 3 or 4 days, but they get soggy. I make a double batch and store them in the FREEZER for up to 3 months for a quick breakfast.

Honey Garlic Shrimp with Red Quinoa & Vegetables

My goto protein for a quick 30-minute meal is shrimp. I buy bags of frozen shrimp whenever it’s on sale. Frozen shrimp defrost under cold water in less than 10 minutes. I like tail-on shrimp because it is fun to eat with your hands, but you can cut the tails off if you want to be fancy. There is no harm in using frozen vegetables to make this meal super quick and colorful.

Preparation time: 15 minutes

Cook time: 15 minutes

Servings: 4

Ingredients

1 pound of fresh or frozen SHRIMP, peeled & deveined  
(26-30 large). I like tail on.
1 teaspoon GARLIC, minced
1/2 teaspoon GINGER, minced
1/4 cup HONEY
2 tablespoons Gluten-free SOY SAUCE
SALT & PEPPER to taste
2 tablespoons cooking OIL
1 cup dry RED QUINOA + 2 cups WATER = 3 cups cooked
Vegetable mix (fresh or frozen):
2 cups BROCCOLI florets
1 cup CAULIFLOWER florets, and
1 cup CARROTS, sliced

Directions

  • PREPARE the shrimp
    • if fresh, peel and devein
    • if frozen, thaw (10 minutes under cold running water). Peel and devein, if not already done.
  • PREPARE the marinade (while shrimp is thawing)
    • WHISK together garlic, ginger, honey, and soy sauce
    • DIVIDE marinade and set aside 1/2 for later
  • MARINADE shrimp with 1/2 the sauce for 15 minutes
  • RINSE and COOK red quinoa according to package directions (should take about 15 minutes)
  • CHOP and SLICE vegetables of choice (I used broccoli, cauliflower, and carrots)
  • STEAM vegetables for 8 minutes or until crisply tender
  • ADD oil to your wok or skillet over medium heat
  • SEAR shrimp in the oil and cook for about 1 or 2 minutes per side
  • RUB the shrimp in the sauce that is left in the pan to coat
  • SERVE shrimp over red quinoa with a generous side of vegetable and DRIZZLE remaining sauce over all

Butternut Squash Vegetable Soup

When it is cold outside there is nothing as comforting as a hot bowl of vegetable soup. Around here we just love soups of all kinds. I try to make soup on the weekends to carry us through a few chilly nights during the week. This hearty soup is full of seasonal goodness from kale and squash and packed with protein from chickpeas to make it a complete dinner. Try it alone or with a nice gluten-free/dairy-free grilled cheese sandwich.       

Preparation time: 30 minutes

Cooking time: 35 – 45 minutes

Servings: 8 as a main course 

Ingredients

4 tablespoons OLIVE OIL
2 large ONIONS, diced
6 CARROTS, diced
6 PARSNIPS, diced
4 stalks CELERY, diced (optional)
4 cloves GARLIC, minced
4 cups (1 whole) peeled BUTTERNUT SQUASH, in 1/2" cubes
4 cups KALE, coursely chopped
1/2 teaspoon ground ALLSPICE
1/4 teaspoon Kosher SALT (more to taste)
1/4 teaspoon CAYENNE PEPPER (more or less to taste)
4 sprigs fresh THYME
8 cups low-salt VEGETABLE BROTH
1 15-ounce can no-salt DICED TOMATOES
1 15-ounce can CHICKPEAS

Directions

  • PEEL and CUT the butternut squash into 1/2″ cubes (follow Simplyrecipes’ direction on how to peel and cut the butternut squash safely)
  • DICE onion, carrots, parsnips
  • MINCE garlic
  • WASH the kale and REMOVE it from the stem by laying the leaf upside down on a cutting board and cutting a V shape along both sides of the rib thereby cutting it free from the leaf.  CHOP the kale coarsely.
  • HEAT olive oil in a large soup pot over medium heat
  • ADD onions and cook for about 5 minutes, until they begin to soften and turn translucent. STIR occasionally
  • ADD the garlic and cook for 1 more minute
  • ADD the butternut squash, carrots, parsnips, (celery if you want), allspice, salt, and cayenne pepper and stir until they begin to brown (about 10 minutes)
  • ADD the sprigs of thyme, broth, and tomatoes
  • Bring to a BOIL then reduce heat and SIMMER for 10 minutes (or until vegetables are tender)
  • ADD chickpeas and kale
  • SIMMER for another 10 minutes, until kale has wilted
  • REMOVE the sprigs of thyme before serving
  • STORE for 5 days in the refrigerator and 3 months in the freezer

Inspired by Ellie Krieger

Egg Yolk Insanely Fluffy Cookies – Gluten-Free & Dairy-Free

I was trying to figure out what to do with a bunch of leftover egg yolks yesterday after making meringue. Somehow I created this insanely fluffy egg yolk chocolate chip monster that is more like cake than a cookie. Naming a recipe is not easy. My first thought for a name was “Chocolate Chip Egg Yolk Cloud Cake Cookie with a Touch of Orange,” but I settled on something shorter.  I will let you be the judge of what to call yours.

Preparation Time: 15-20 minutes

Cooking Time: 10-12 minutes

Servings: 60

Ingredients

1/2 cup Vegan BUTTER (1 Earth Balance Soy Free stick)
3/4 cup SUGAR
1/2 cup natural APPLE SAUCE
6 EGG YOLKS (or 4 egg yolks & 1 whole egg)
2-1/2 cups gluten-free ALL PURPOSE BAKING MIX (King Arthur)
1 teaspoon BAKING SODA
1 teaspoon VANILLA EXTRACT
1 teaspoon ORANGE EXTRACT (if you don't have it
add another teaspoon of vanilla extract)
1 pinch SALT
3/4 Vegan MINI SEMI-SWEET CHOCOLATE CHIPS (Enjoy LIfe)
Parchment PAPER

Directions

  • PREHEAT oven to 350 degrees F
  • COVER 2 cookie sheets with parchment paper (or you can lightly grease them) 
  • CREAM the butter and sugar until fluffy
  • ADD the applesauce to the creamed mixture and BLEND well
  • SEPARATE egg whites from yolks. I use 3 bowls to do this: 1 bowl for the yolks, 1 bowl for the whites, and 1 bowl for the shells. After separating all 6 eggs, put the egg whites in the refrigerator (use them for something else, like my Dark Chocolate Meringue Cookies). 
  • BEAT the egg yolks and the extracts together
  • ADD the beaten egg yolk/extract mixture to the creamed mixture and BLEND well
  • In a separate bowl, WHISK together all the dry ingredients
  •  ADD the dry ingredients, a third at a time, to the creamed mixture and BLEND well.
  • ADD the mini chips to the batter and BLEND 
  • DROP the batter onto the parchment covered baking sheets in evenly spaced slightly rounded teaspoons of goo (for bigger cookies use a tablespoon instead)
  • Slightly FLATTEN the batter globs if you can, they won’t spread much
  • BAKE for 10 to 12 minutes. They will look undercooked and should be only slightly golden.
  • COOL on cookie sheets for a few minutes and then plate
  • STORE them in an airtight container for up to 1 week   

Dark Chocolate Meringue Cookies – Gluten & Dairy Free

I love when the house smells like chocolate. These cookies are so chocolatey, crunchy and chewy at the same time, that no one notices that they contain no flour or butter. Did you know that making a meringue is easy? It is just really air, eggs whites, and sugar. Give these yummies a try next time you need a chocolate fix.  

Preparation Time: 20 – 30 minutes, depending on your equipment

Cooking Time: 18 minutes

Servings: Makes about 40 cookies 

Ingredients

4 EGG WHITES
1/2 teaspoon LEMON JUICE
1/2 teaspoon VANILLA
1/8 teaspoon SALT
1/4 cup SUGAR
12 ounces Vegan DARK CHOCOLATE MORSELS, melted
1/2 cup WALNUTS, chopped
Enough WALNUT halves to decorate cookies
1/2 cup DRIED CHERRIES, chopped
Parchment PAPER

Directions

  • PREHEAT oven to 325 degrees F
  • LINE 2 large cookie sheets with parchment paper
  • SEPARATE egg whites from yolks. I use 3 bowls to do this: 1 bowl for the yolks, 1 bowl for the whites, and 1 bowl for the shells. After separating all 4 eggs, put the egg yolks in the refrigerator (I use them to make my Egg Yolk Insanely Fluffy Cookies) and let the egg whites reach room temperature. 
  • MELT the chocolate morsels, either in a double boiler or microwave. I microwave mine on medium-high (50% power) for 1 minute, then stir, then repeat on medium-high for 20 to 30 seconds at a time, again and again until melted and smooth. Set aside to cool.  
  • COMBINE egg whites, lemon juice, vanilla and salt in a large, clean bowl. (A grease-free bowl is a must when making meringue. Also, make sure there is no yolk in your egg whites or it can keep them from fluffing nicely.)
  • Using an electric hand mixer, or a stand mixer, fitted with the whisk attachment, BEAT the mixture on low speed until foamy.
  • Increase mixer speed and GRADUALLY ADD sugar, a little at a time, until combined.
  • BEAT mixture on high until stiff peaks form. (Be patient this can take several minutes.)
  • Using a spatula, FOLD in the cooled chocolate, chopped walnuts, and the dried cherries. Make sure not to over combine as you don’t want to lose the airiness of the meringue.
  • FILL a pastry piping bag, or improvise with a large zip-lock plastic bag*, with half of the meringue mixture.
    • If using a plastic bag, cut a 3/4 inch hole in one corner.
    • If using a pastry bag, use a large star tip. 
  • PIPE cookies (about 2″ each) on to the prepared parchment covered cookie sheets.
  • REPEAT the process with the other half of the meringue.
  • TOP each cookie with a half of a walnut.
  • BAKE for 12 minutes and then check on them. The cookies are done when they are set and dry looking. This can take 15 to 20 minutes. 
  • REMOVE cookie sheets from the oven and allow the cookies to COOL completely on the sheets. 
  • STORE in an airtight container for 1 week. 

*Piping is not always easy for those of us with arthritis in our hands. My alternative is to drop the batter onto the parchment covered baking sheets in evenly spaced slightly rounded teaspoons of goo.  

Inspired by Alison Ashton who was inspired by Gail Simmons

Avocado & Smoked Salmon Bagel – Gluten-Free & Dairy-Free

Breakfast is the most important meal in my opinion. You are just running on empty if you don’t fill the tank early in the day. I like to start my day with a savory gluten-free everything bagel,  topped with a mashed ripe avocado and Nova Lox. A fresh gluten-free bagel is a rare treat but you can find lots of gluten-free varieties in the freezer section. I have been known to eat this sandwich at lunch and sometimes even dinner.  
Preparation time: 10 minutes

Servings: 1

Ingredients

1 gluten-free EVERYTHING* BAGEL, halved and toasted
1/2 ripe AVOCADO, mashed
SALT & PEPPER to taste
2 slices SMOKED SALMON (aka Nova Lox)**
Optional Toppings
1 slice of TOMATO
1 slice of ONION

*The traditional New York Everything Bagel contains:
Poppy Seeds, Sesame Seeds, Black Sesame Seeds,
Minced Dried Garlic, Minced Dried Onion, and Sea Salt

**There is a difference between lox and smoked salmon.
Lox is salt-cured and not smoked. Must people really want
smoked salmon, which is cured and smoked. Nova Lox, which
originally came from the waters of Nova Scotia, is a type of
cold-smoked salmon that is preferred to salty 'belly' lox.

Directions

  • SLICE the bagel in half and TOAST
  • SLICE the avocado in half lengthwise, twist it, and remove the pit
  • MASH 1/2 the avocado and ADD salt and pepper to taste
  • SPREAD each half of the bagel with avocado
  • TOP each halve with a slice or 2 of smoked salmon 
  •  Optionally, top with tomato or onion slices
Everything Bagel with Avocado and Smoked Salmon

Grandma’s Potato Latkes – Gluten-Free & Dairy-Free

This Hanukkah treat is all about the frying. It represents the magic of the oil that lit the menorah (holy candelabra) for 8 days when there was only enough oil for 1 day.  There is no dairy in this dish and by using gluten-free matzo meal it’s just like my mother made. I remember grinding 10 pounds of potatoes by hand with a meat grinder, luckily today I use a food processor. For the no egg, Vegan version, check out my other recipe. 

Preparation Time: 20 -30 minutes

Cooking Time: 10 minutes a pancake/batch

Servings: 8


Ingredients

3 cups POTATOES, grated and drained well 
About 8 medium Yukon Gold or Idaho 1 large ONION, grated 2 EGGS, beaten 1 teaspoon SALT 1/4 teaspoon BLACK PEPPER 2 tablespoons gluten-free MATZO MEAL 1/2 cup Vegan BUTTER or other light oil for frying Roll of PAPER TOWELS APPLESAUCE or Vegan SOUR CREAM, optional

Directions

  • Using a fine or medium grater blade on your food processor,* GRATE the potatoes
  • DRAIN the grated potatoes really well before continuing. I put the grated potatoes in a big wire strainer over a large bowl. I then place a plate over the mixture and press down gently to express the potato starch. Get rid of as much liquid as you can. Warning: potato starch is really messy.
  • Using a medium grater blade on your food processor,* GRATE the onion (or finely chop if you prefer). Keep the onion juice and add to the mix for flavor.
  • In a large bowl, ADD the onion to the drained potatoes and mix well
  • BEAT the eggs and ADD to the onion/potato mixture
  • STIR in the seasonings and matzo meal
  • HEAT a small amount of the butter or oil in a large frying pan.  Let it get hot
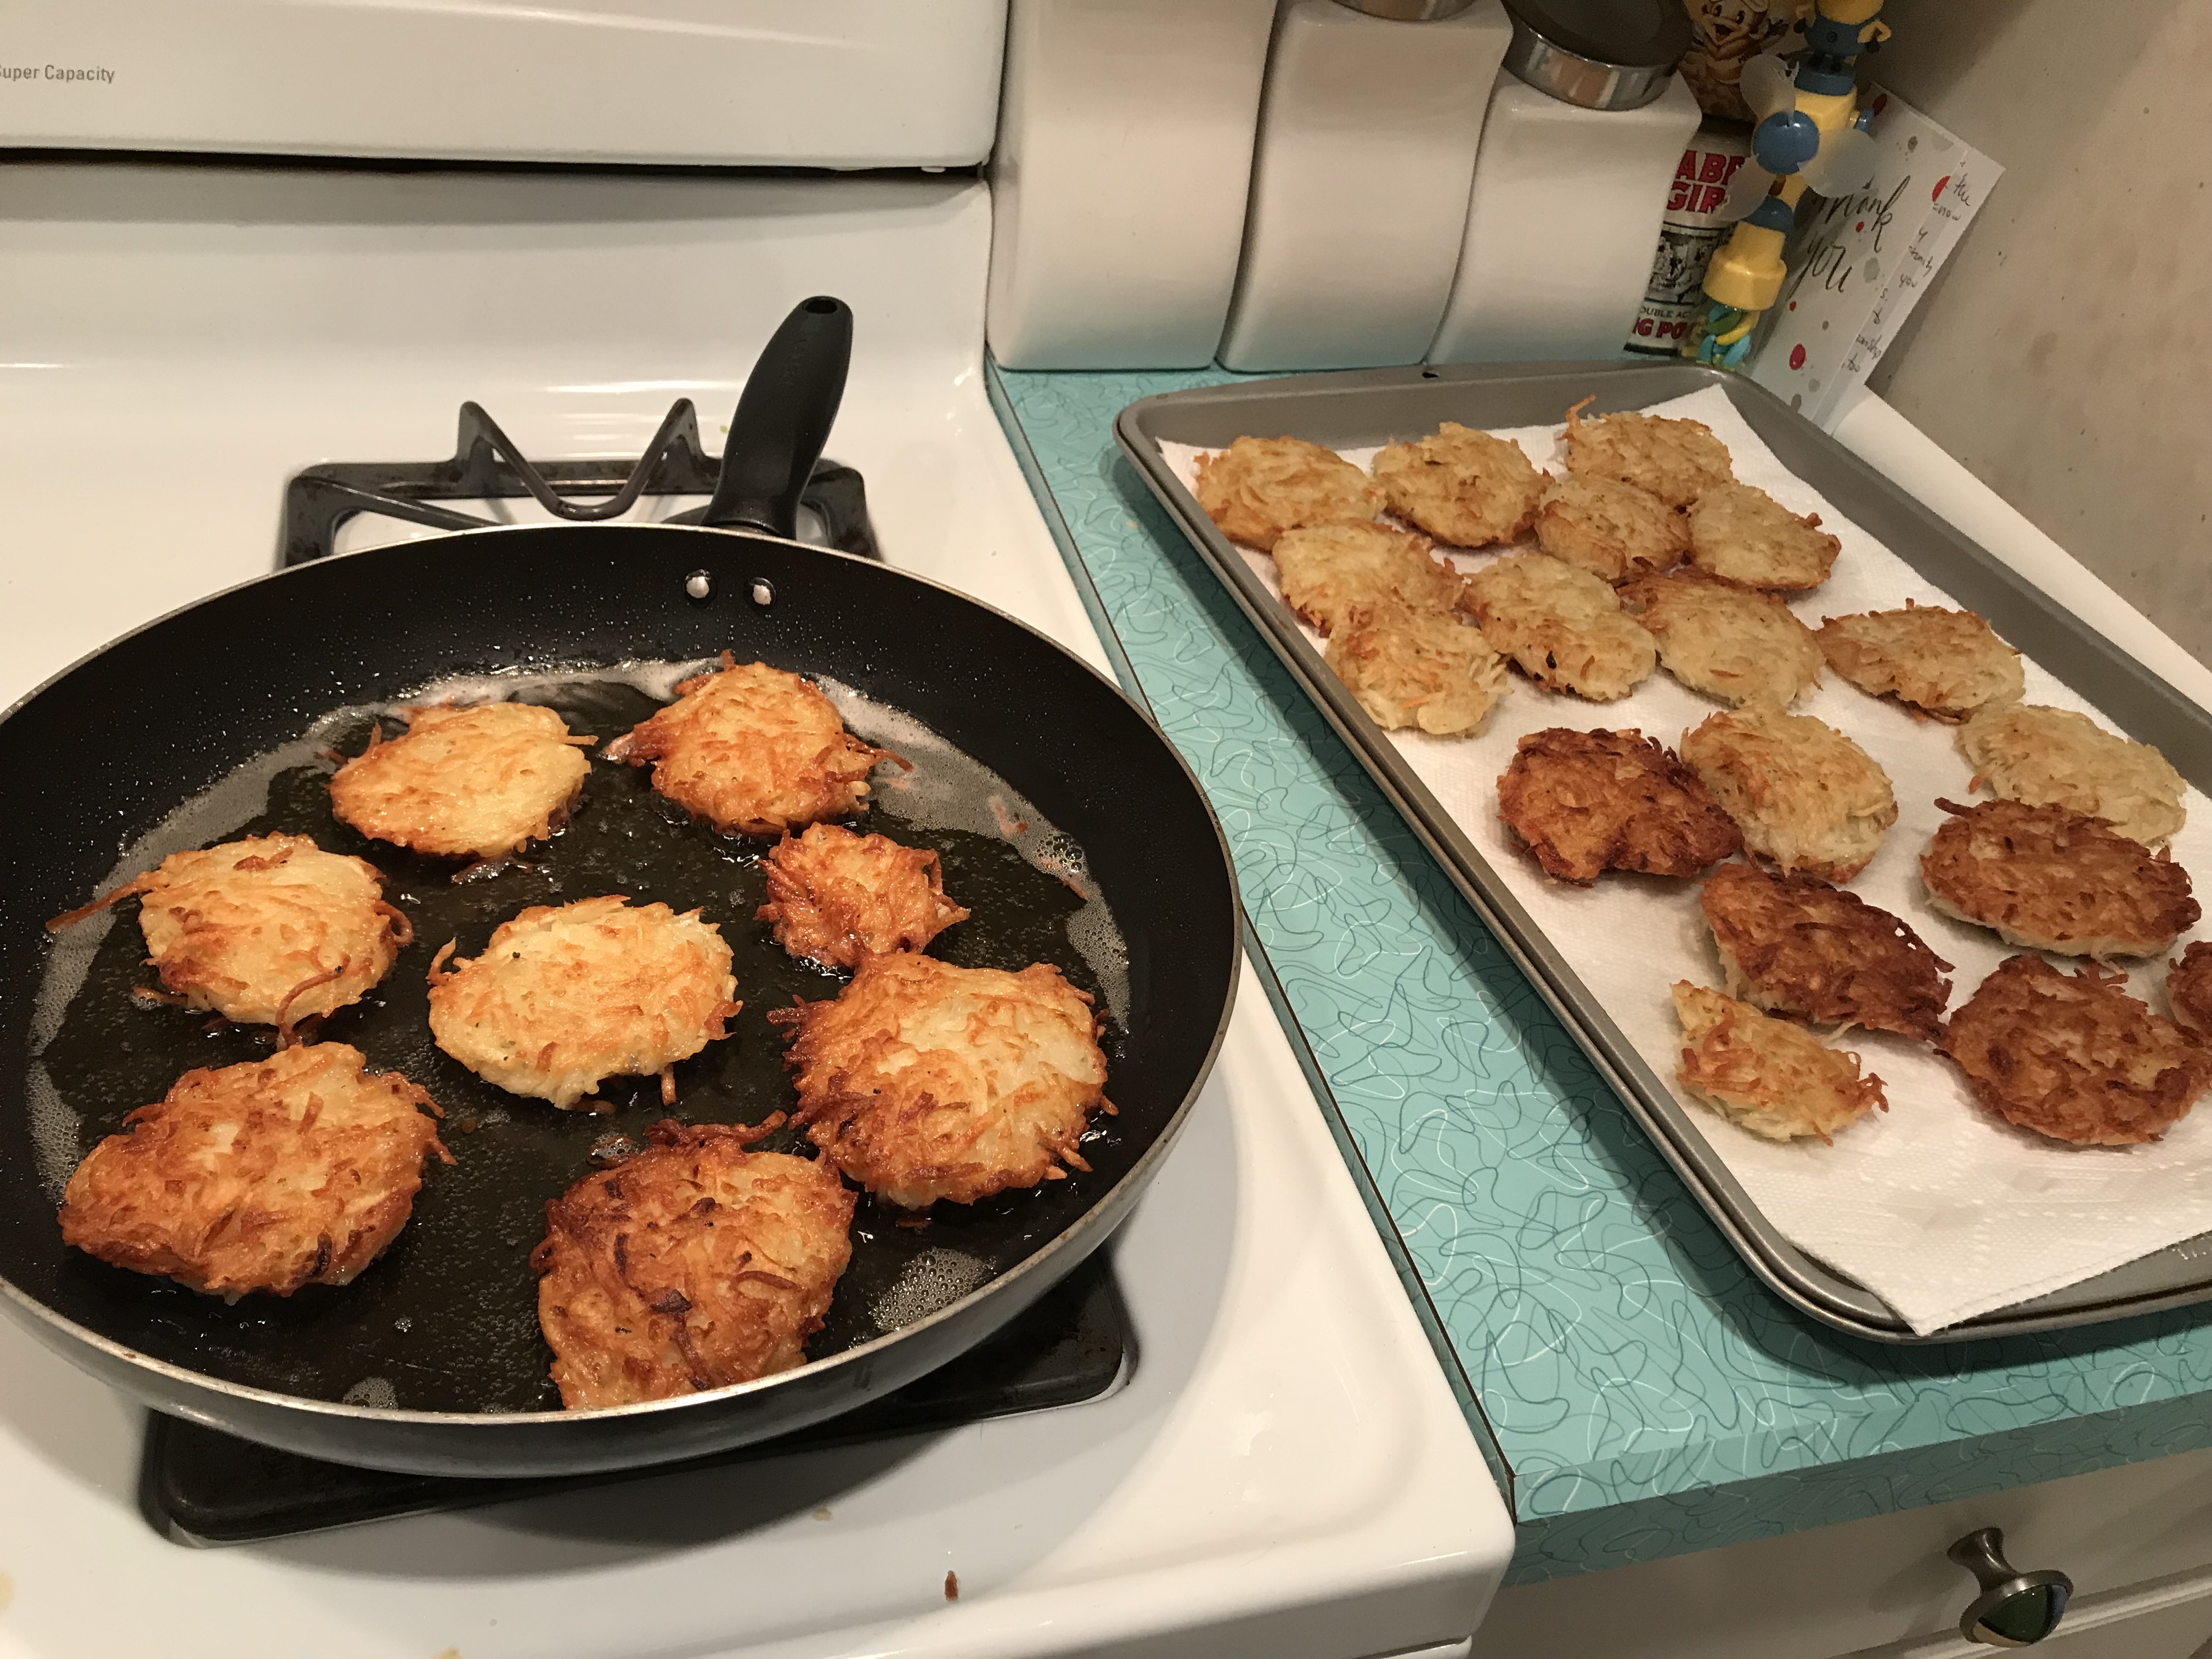
  • SPOON (or I use my hands and make patties so I can squeeze out any excess liquid) the mixture into the frying pan and form pancakes. I usually get 6 to 8 pancakes in the pan at a time
  • FLATTEN the pancakes with a spatula
  • FRY each pancake for about 5 minutes over medium heat, then turn over until nicely browned on both sides. (I like my latkes dark and crisp, but my spouse likes them undercooked, so it’s up to your taste how long you fry)
  • Layer paper towels on a plate or cookie sheet and place the cooked latkes on the paper towels to DRAIN. I make so many that I build a tower of draining latkes in paper towel tiers
  • Add more butter or oil as required to fry the next batch
  • Serve hot with applesauce or vegan sour cream

*To make latkes without a food processor, just grate the potatoes manually, chop the onions as finely as possible (or grate them too) and follow the rest of the instructions above.

This recipe was inspired by Jennie Grossinger from “The Art Of Jewish Cooking,” personally autographed to my mother in 1958 by Jennie.


Happy Peanut Butter Cups – Gluten-Free & Vegan

Chocolate and peanut butter: two flavors that make me happy. I like to make these little happy treats for birthdays and other sweet times. The process isn’t too complicated and with only 3 ingredients, you can’t go wrong. Note that the quality of the peanut butter you choose will affect the overall taste of the dessert, so use good stuff (organic vs Skippy, for example).  I hope they make you happy too. 

Total time: about 40 minutes from prep to eat 

Servings: 10-12

Ingredients

7 ounces of Vegan CHOCOLATE MORSELS or SQUARES
4 tablespoons of COCONUT OIL
3/4 cup good quality PEANUT BUTTER
12 cupcake PAPER LINERS 

DIRECTIONS

  • PLACE 10 to 12 cupcake paper liners in a flat baking dish.
  • In a double boiler* on medium heat, MELT the chocolate with 2 tablespoons of coconut oil. STIR occasionally until completely combined. TURN off heat but leave on the stove to stay warm.
  • In a small bowl, MIX peanut butter and 2 tablespoons of coconut oil until well combined.
  • SPOON a small amount of the chocolate/coconut oil mixture into each cup; enough to cover the bottoms.
  • FREEZE the cups for a few minutes to set; 2 or 3 minutes should be fine.
  • Remove cups from freezer and DROP a small spoonful of peanut butter/coconut oil mixture on top of the hardened chocolate/coconut mixture in each cup.  FLATTENING with the back of a spoon. 
  • Then SPOON more chocolate/coconut oil mixture into each cup. If you want them to be like Reeses then put in enough chocolate/coconut oil mixture to cover all the peanut butter. I just drizzle chocolate on top for a pretty effect. 
  • FREEZE until ready to serve (at least 15 minutes to harden).
  • THAW to serve:  REMOVE the treats from the freezer about 30 minutes before you want to serve them. REMOVE the paper liners and place the naked treats in the refrigerator to thaw. If the treats get too soft they can lose their shape. If they do throw them back in the freezer for 5 minutes until they harden again.   

 *NOTE: Instead of a double boiler, I use a saucepan with about 1 inch of water in it with a heat safe bowl on top. Make sure that the bowl does not touch the water, as you want the chocolate to steam not boil. 

Mom’s Outrageously Good Gluten-Free Vegan Mac & Cheese

To me, Macaroni and Cheese is the ultimate American comfort food. My gluten-free and dairy-free version of this classic, similar to the original 1794 recipe by Elizabeth Raffald, is based on a creamy white mornay sauce. The secret is in the roux so don’t let it burn.  I recommend you spice the dish up a notch because Vegan cheese can be bland. We love it with sweet peas.   

Cooking Time: 30 minutes

Servings: 6 -8

Ingredients

1 16-ounce package of Gluten-free ELBOW MACARONI
2 cups Vegan CHEDDAR CHEESE (I use Daiya brand)
1 cup Vegan MOZZARELLA CHEESE (I use Daiya brand)
3 tablespoons Vegan BUTTER (I use Earth Balance brand soy-free sticks)
3 tablespoon Gluten-free FLOUR
2 cups CASHEW MILK (my favorite) or any milk alternative (Rice/Almond)
1/4 teaspoon BLACK PEPPER
1 teaspoon of GARLIC POWDER
1 teaspoon of ONION SALT
SALT to taste (warning Daiya cheese tastes salty to me so salt sparingly)
Gluten-free ITALIAN BREAD CRUMBS to cover the top
1/4 teaspoon PAPRIKA

Directions

  • PREHEAT oven to 350 degrees F.
  • COOK the macaroni a few minutes less than the instructions on the package tells you to (like 5 minutes instead of 8). The pasta will continue to cook when you bake it.
  • GREASE an 8X10 baking dish. I use a smaller baking dish then I think I need so that the recipe sets up nicely. 
  • DRAIN the pasta and place it in the greased baking dish.
  • MIX 1 cup of the Vegan cheddar cheese and 1/2 cup of the Vegan mozzarella cheese into the pasta.
  • In a medium saucepan, MELT the butter over low heat. 
  • ADD the flour and WHISK continuously until gooey.
  • STIR in the milk*, pepper, garlic powder, and onion salt until mixture starts to boil and then stir another 1-2 minutes until it gets thick and bubbly. (*NOTE: Don’t let the sauce turn into a paste. You just want a thick liquid. Add more milk as needed.)
  • POUR the milk mixture over the cheese/pasta in the baking dish and mix thoroughly.
  • TOP the dish with the remaining cheeses, SPRINKLE with plenty of bread crumbs, and then DUST with paprika.
  • BAKE for 30 minutes. The top should be nicely browned and the cheese should be bubbly.
Mac & Cheese ready for the overn
Mac & Cheese ready for the oven

Spiced Pumpkin Muffins – Gluten-Free & Dairy-Free

Sometimes, I just crave a breakfast muffin. I like to heat them for 30 seconds in the microwave and then slather Vegan cream cheese on top. I tend to throw the kitchen sink of spices into these muffins so that the flavors of winter just explode in every bite. Adjust the spices and add-ins to match your mood.

Cooking Time: 45 minutes

Servings: 18

Ingredients

1-2/3 cup All Purpose GLUTEN-FREE FLOUR
1/2 teaspoon CINNAMON
1/2 teaspoon CLOVES
1/2 teaspoon NUTMEG
1/2 teaspoon GINGER
1/4 teaspoon BAKING POWDER
1 teaspoon BAKING SODA
1/2 teaspoon SALT
3/4 cup HONEY
2 EGGS (or Vegan egg replacer)
1/2 cup melted Vegan BUTTER (I use Earth Balance)*
1 15-ounce can of PUMPKIN PUREE (not Pumpkin Pie Mix)
1/4 cup cold WATER
1/4 cup dried CRANSBERRIES or RAISANS
1/4 cup chopped WALNUTS
1/4 cup dairy-free chocolate morsels (optional)
18 Paper Muffin LINERS

*If you are watching your fat, you can replace butter with APPLESAUCE.

Directions

  • PREHEAT oven to 325 degrees F.
  • LINE 2 12-cup muffin tins to handle about 18 muffin cups.
  •  In a large mixing bowl, MIX all dry ingredients together well.
  • In the same bowl, ADD all the rest of the ingredients and just throw it on top of the dry ingredients. STIR to combine. (I use a wooden spoon but I guess you could use an electric mixer.)
  • SPOON the batter into the lined muffin cups until each is about 3/4 filled.
  • BAKE for 40-45 minutes. (About 1/2 the time if you are making mini muffins).
  • TEST for doneness by inserting a toothpick (or another tester) into the center of a muffin. If it comes out with only a few moist crumbs on it, then they’re done. 
  • COOL for 10 minutes before removing them from the tins. If the muffins are stuck to the tin you can run a knife around them to loosen. 
Pumpkin happiness on the rise
Perfect blend of spices and pumpkin

Storage: You can store the muffins at room temperature in an airtight container for up to 5 days or freeze them for 3 months. 

Pear & Brussels Sprouts Salad

With all the Romaine lettuce contamination scares in the United States, I decided to use Brussels sprouts as an alternative salad base. The maple-balsamic dressing and the pears make this salad so sweet and delicious that we literally fought over the bowl. I never thought I could learn to love those little ‘heads’ so much.

Preparation Time: 15 minutes

Servings: 6

Ingredients

Salad
1 pound of BRUSSELS SPROUTS, pulled and sliced
2 ripe PEARS, chopped
1/4 cup sweetened dried cranberries (CRasians)
1/4 cup PECANS, coursely chopped
Dressing
2 tablespoons of extra-virgin OLIVE OIL
1 tablespoon of MAPLE SYRUP
1-1/2 tablespoons of BALSAMIC VINEGAR
1 teaspoon DIJON MUSTARD
1/4 teaspoon SALT
1/8 teaspoon PEPPER
1/4 clove GARLIC, optional

Directions

  • In a medium bowl, prepare the salad dressing by WHISKING together the oil, maple syrup, vinegar, and mustard and then salt and pepper to taste. Add garlic if you want a little extra kick.
  • CLEAN the Brussel sprouts by cutting off the stalk end and then pull off and discard the tough outer leaves. SLICE the Brussels sprouts as thin as you like with a very sharp knife. I mix both ripped leaves and thinly sliced pieces for a nice texture. 
  • In a large bowl, MIX Brussel sprouts, pears, cranberries, and pecans.
  • POUR salad dressing over mixture and TOSS salad.

This recipe was inspired by “Shredded Brussels Sprouts Salad with Maple-Balsamic Vinaigrette” from Martina’s Kitchen Mix by Martina McBride.

Vegan Potato Latkes

By replacing eggs with tofu, these amazing potato latkes (pancakes) are the perfect fried dish to celebrate Hanukkah. I use two frying pans to keep the production line going. People start stealing them from the plate before I ever get them to the table. 

Preparation Time: 30 minutes

Cooking Time: 10 minutes a pancake/batch

Servings: 6-8

Ingredients

3 cups POTATOES (about 8 medium Yukon Gold or Idaho), drained well
1/2 pound firm TOFU, drained well
1 large ONION
1 teaspoon SALT
1/4 teaspoon BLACK PEPPER
1 clove GARLIC, optional
2 tablespoons gluten-free MATZO MEAL
1/2 cup Vegan BUTTER or other light oil for frying
Roll of PAPER TOWELS
APPLESAUCE or Vegan SOUR CREAM, optional

Directions

  • Using a fine or medium grater blade on your food processor,* GRATE the potatoes
  • DRAIN the grated potatoes really well before continuing. I put the grated potatoes in a big wire strainer over a large bowl. I then place a plate over the mixture and press down gently to express the potato starch
  • Using a medium grater blade on your food processor,* GRATE the onion (or finely chop if you prefer)
  • In a large bowl, ADD the onion to the drained potatoes and mix well
  • PROCESS or MASH the tofu until it is creamy with a few lumps
  • ADD the tofu to the onion/potato mixture
  • STIR in the seasonings and matzo meal
  • HEAT a small amount of the butter or oil in a large frying pan.  Let it get hot
  • SPOON (or I use my hands and make patties) the mixture into the frying pan and form pancakes. I usually get 6 to 8 pancakes in the pan at a time
  • FLATTEN the pancakes with a spatula
  • FRY each pancake for about 5 minutes over medium heat, then turn over until nicely browned on both sides. (I like my latkes dark and crisp, but my spouse likes them undercooked, so it’s up to your taste how long you fry) 
  • Layer paper towels on a plate or cookie sheet and place the cooked latkes on the paper towels to DRAIN. I make so many that I build a tower of draining latkes in paper towel tiers
  • Add more butter or oil as required to fry the next batch
  • Serve hot with applesauce or vegan sour cream

*To make latkes without a food processor, just grate the potatoes manually, chop the onions as finely as possible (or grate them too), mash the tofu, and follow the rest of the instructions above.

This recipe was inspired by Jennie Grossinger from “The Art Of Jewish Cooking,” personally autographed to my mother in 1958 by Jennie.

Almond Paste Macaroons

I love almond anything and these traditional Italian Christmas cookies are quick and easy to make for any holiday gathering with pre-made or store-bought almond paste. At only 30 to 40 calories per cookie, who can resist eating a few? They are gluten and dairy free, and if you make them with egg replacer they can even be Vegan. Be careful not to overcook them or they turn into little rocks. 

Cook Time: 20 – 30 minutes

Servings: 18

Ingredients

1 extra large EGG WHITE (Vegans can use EGG REPLACER)
1 8-ounce can ALMOND PASTE (or make 14-ounces of your own as follows)
1-1/2 cup BLANCHED ALMONDS or ALMOND MEAL/FLOUR
1-1/2 cup POWDERED SUGAR
1 EGG WHITE
(Vegans can use EGG REPLACER, with 3 teaspoons of CORN SYRUP)
2 teaspoons ALMOND EXTRACT
1/4 teaspoon SALT
1/2 cup granulated SUGAR
18 MARACHINO CHERRIES, optional
18 Sliced ALMONDS, optional

Directions

  • If you are making your own almond paste then do it at least the night before you make the cookies because it needs to be refrigerated to firm up.
  • To make almond paste: 
    • In a food processor, GRIND the blanched almonds (or use almond meal/flour already ground)
    • COMBINE the ground almonds and sugar and PULSE until well mixed
    • ADD almond extract and pulse again until combined
    • ADD egg whites (or egg replacer and corn syrup) and mix until it forms into a dough. If the mixture is too wet, add more sugar or almond flour
    • TURN OUT onto a clean work surface, KNEAD a few times, and ROLL the dough into a log
    • SPLIT the log into 2 servings (about 7-ounces each). Then WRAP each log in plastic and place in the refrigerator overnight. The dough will keep for at least a month in the refrigerator and up to six months in the freezer. 
  • PREHEAT oven to 325 degrees F
  • LINE a cookie sheet with parchment paper
  • COMBINE almond paste (after you break it into pieces for easier blending) and sugar in food processor. 
  • ADD egg white (or Vegan egg replacer) and mix in the food processor until the dough is sticky (2 or 3 minutes). (Note: If you chose to go the Vegan route, the cookies are not as chewy which is why you might want to add corn syrup, but it just isn’t the same as egg whites and it is hard to get the dough tacky enough.)
  • DROP rounded tablespoons of cookie dough onto the cookie sheet about 1 inch apart.
  • TOP cookies with either 1/2 a cherry or a sliced almond. You may have to press the cherry or almond into the cookie a little bit to make it stick.
  • BAKE 15 – 20 minutes on the middle shelf and then move them to the upper rack for 5-7 minutes.  The cookies should be golden brown in color.
  • MOVE cookies and parchment paper to a cooling rack and let them completely cool before placing in airtight containers.      

Inspired by the “Almond Macroons” recipe on the side of the Solofoods Almond paste box. https://solofoods.com 

Vegan Pumpkin Pie

What would Thanksgiving be without a wonderful gluten-free and dairy-free vegan pumpkin pie? I usually make 2 at a time because it gets eaten so quickly (just double the recipe with no problem). Treat yourself to some vegan whipped topping to finish it off (they have so many varieties of dairy-free whipped topping these days, who can resist?)    

Cook Time: 75 minutes

Servings: 8

Ingredients

1 15-ounce can of pure PUMPKIN PUREE (not pumpkin pie mix)
3/4 cup BROWN SUGAR (light brown sugar makes a nicer looking pie)
1 12-ounce packages of EXTRA FIRM SILKEN TOFU
1 teaspoon CINNAMON
1/4 teaspoon CLOVES
1/4 teaspoon NUTMEG
1/2 teaspoon SALT
1/2 teaspoon GINGER (I like ginger, use less if you don't)
1 9-inch unbaked gluten-free PIE SHELL
Vegan WHIPPED TOPPING (optional but a really good complement)

Directions

  • PREHEAT the oven to 435 degrees F
  • BLEND the pumpkin and brown sugar in a blender
  • ADD the tofu, salt, and spices and blend until smooth
  • POUR the mixture into the pie shell (I recommend putting the pie on a cookie sheet because the filling tends to run over the sides)
  • BAKE for 15 minutes then reduce temperature to 350 degrees F for another 60 minutes or until the filling has set
  • CHILL and server with vegan whipped topping

Green Bean Casserole – Vegan

This is my daughter’s all-time favorite and it disappears quickly. Nutritional yeast makes all the difference and you can get that at most health food stores (I get mine at the Amish Market). Don’t overfill the dish with too much sauce or it will be soupy. I undersize the casserole dish so that it sets up nicely.

Cook time: 20 minutes

Servings: 6

Ingredients

1/4 cup (1/2 stick) vegan BUTTER
1/4 cup gluten-free FLOUR
1 1/2 cup vegetable BROTH
1 tablespoon gluten-free TAMARI (Soy Sauce)
1/2 teaspoon GARLIC POWDER
2 tablespoons Vegetable OIL
1/4 cup NUTRITIONAL YEAST
SALT and PEPPER, to taste
2 14.5-ounce cans French-style or Cut GREEN BEANS, drained
1 2.8-ounce can of gluten-free FRENCH FRIED ONIONS (hard to find but they do exist)

Directions

  • PREHEAT the oven to 350 degrees F
  • In a medium saucepan, MELT the butter over low heat
  • ADD the flour and WHISK continuously until gluey
  • ADD the broth, tamari, and garlic powder, whisking continuously for 1 or 2 minutes, until thick and bubbly
  • ADD the vegetable oil and nutritional yeast. Whisk until smooth
  • In a small casserole dish mix the GREEN BEANS and the SAUCE so that the beans are coated. Don’t use too much sauce or it won’t set nicely
  • BAKE for 10 minutes
  • Remove from oven and SPRINKLE the French-fried onions on top
  • BAKE another 10 minutes, until brown and bubbly

Oven Roasted Root Vegetables

Every year I try some different veggies (this year it was purple turnips and yellow beets) depending on what looks good in the market. The natural sweetness of beets, carrots, and sweet potatoes makes this an annual Thanksgiving favorite. This dish is a great alternative to the ever-present sugar and fat-laden sweet potato casserole topped with marshmallows.

Cook Time: 50 minutes

Servings: About 12

Ingredients

2 cups CARROTS, peeled & sliced
1 pound BEETS, cut into 1" pieces
2 medium SWEET POTATOES, cut into 1" pieces
3 medium PARSNIPS, peeled & sliced
1 medium TURNIP, cut into 1" pieces
3 medium RED POTATOES, cut into 1" pieces
2 medium RED ONIONS, cut into wedges
5 cloves GARLIC, whole
1 tablespoon OLIVE OIL
1 tablespoon fresh ROSEMARY LEAVES, chopped
1 tablespoon fresh THYME LEAVES
1 cup VEGETABLE BROTH

Directions

  • HEAT the over to 425 degrees F
  • LINE a shallow roasting pan with aluminum foil. The size of the pan should match how many veggies you are using. I suggest a 17X11-inch
  • PLACE the veggies in the pan and mix with the herbs and the oil
  • ROAST the veggies for 30 minutes
  • POUR broth over the veggies and stir
  • ROAST another 20 minutes or until everything is tender